How to setup PostgreSQL and Drizzle ORM in a NextJS 13+ app
#What we're gonna do
In this tutorial, I'm going to show you how to set up PostgreSQL hosted locally on Docker and how to connect it with the Next.js application using Drizzle ORM. We will write our first schema, generate our first migration and also set up the Drizzle Studio with minimal effort. Let's get into it!
#Step 1 - setting up the Docker
In the root folder of our application, we create the docker-compose.yml file and insert this config inside of it. We don't necessarily have to create this file in the root of our app, but keeping it close to our application would make sense to me.
./docker-compose.ymlversion: '3'
services:
   db:
      image: postgres
      restart: always
      volumes:
         - pgdata:/var/lib/postgresql/data
      ports:
         - 5432:5432
      environment:
         - POSTGRES_DB=blog_db
         - POSTGRES_USER=postgres
         - POSTGRES_PASSWORD=postgres
volumes:
   pgdata:
Let's break this config down very quickly:
version: '3'means we will be using the current latest Docker Engineservicessection is where we define what services we want to run (in our case it's only the "db" service, we could call it anything else as well)volumessection is where we define the volumes (persistent data storage) that our service will be usingdb.image: postgresmeans that we will be using the Postgres image for this servicedb.volumes: pgdata:/var/lib/postgresql/datamaps data folder of our container to our local volume "pgdata"db.ports: 5432:5432maps container's port 5432 to our local machine's port 5432, which is a port under which our database will be availabledb.environmentis a section where we define all environment variables used later by Postgres. They need to be named exactly the way they are in the config and their values will be important later on, when we will be connecting to this database from our app.POSTGRES_DBis a name for our database that we will later be accessing.POSTGRES_USERandPOSTGRES_PASSWORDare credentials to this database.
With the config briefly covered, we can run docker compose up in the location of this file and wait a few moments for docker to finish setting up our container. If everything went right, we should see this message in console.
 docker-compose console output
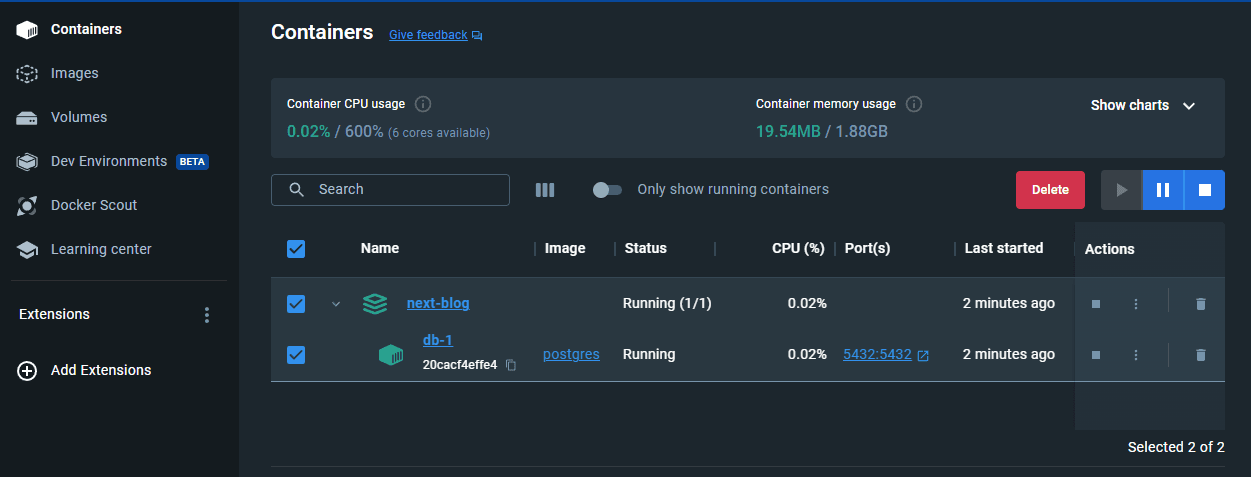
If we jump to the Docker Desktop app, we should see our container on the list of containers with the proper names, images and ports.
 Container running in Docker Desktop
From this point on, we can start and stop our container from this interface, instead of doing it through CLI.
#Step 2 - installing all the required dependencies
Drizzle ORM supports a few PostgreSQL drivers as well as cloud providers, so we can choose from the official docs our desired way to do this. Since we are using local docker container, instead of some cloud solution, I'm gonna go with node-postgres. Postgres.JS would be fine as well, it boils down to a matter of preference. Regardless of our selected method, we would have to install a few dependencies to our project.
For the node-postgres driver we have to install following dependencies and dev-dependencies:
pnpm add drizzle-orm pgpnpm add -D drizzle-kit @types/pg dotenv
I have added dotenv package to the list, as we will need it later on in this tutorial.
#Step 3 - creating our first schema
For this step, I'd like to create the src/db/ folder, in which I'm gonna keep all the things database-related. In this folder, I'm creating the first file - schema.ts. We're gonna keep our database schemas in here.
Since I'm creating a blog application, my first table would be the "posts" table. To create a table schema, we have to import pgTable function from drizzle-orm/pg-core, as we are using the postgres integration.
./src/db/schema.tsimport { pgTable, char, text } from 'drizzle-orm/pg-core';

export const posts = pgTable('posts', {
	slug: text('slug').primaryKey(),
	title: text('title').notNull(),
	subtitle: text('subtitle'),
	createdAt: char('createdAt', { length: 10 }).notNull(), // must be 2023-01-01
	excerpt: text('excerpt').notNull(),
	tags: text('tags').array().notNull(),
	categories: text('categories').array().notNull(),
});
This function requires two arguments: table name as a string, and an actual schema in the form of object.
I don't want to elaborate on my exact schema, as all the data types you can find easily in the docs. I'm only gonna point out that in my case, I choose the slug column to be the primary key. In your case you may want some ID in the form of auto-incrementing number to be your primary key. In that case, use serial data type.
Okay, so now that we have both our database running and our schema created, how to create an actual table in our database, that would have this exact schema? The answer is - migrations. But before we jump right into it, we need to set up a little config, to make this migration process a bit easier.
#Step 4 - adding config
#Connection string environment variable
Have you used your .env.local file yet? If not, you should create it now. This is a file where we will be keeping all environment variables for our application. In my simple use case I only need .env.local file to be fully satisfied. If you have more complex requirements, like different testing environments and so on, head to the official docs to get some assist.
With that preface, let's head to the (newly created?) .env.local file
./.env.localPOSTGRES_URL="postgresql://postgres:postgres@localhost:5432/blog_db?schema=public"
In this file we should add one env variable - POSTGRES_URL. In this case you can name it however you want, what's important is its value - it should be a connection string to our postgres database. Connection string in general has this format:
postgresql://{username}:{password}@{host.address}:{port}/{db_name}?schema=public
In our case, we take all those values from our docker-compose.yml file.
usernameis value ofPOSTGRES_USERfield fromdocker-compose.ymlpasswordis value ofPOSTGRES_PASSWORDfield fromdocker-compose.ymlhost.addressislocalhost(as long as we run it locally)portis5432(also defined in the docker config)db_nameis value ofPOSTGRES_DBfield fromdocker-compose.yml
We can use this variable as process.env.POSTGRES_URL later in code. To make this type-safe, we can add following code to the index.d.ts file of our application (you can create it if you don't see it).
./index.d.tsnamespace NodeJS {
	interface ProcessEnv {
		POSTGRES_URL: string;
	}
}
#Drizzle config
There's one more file that we need to create: drizzle.config.ts (can also be .js or .json). That's the place where we will use the dotenv package, to read the value of our connection string set in a previous step.
./drizzle.config.tsimport type { Config } from 'drizzle-kit';
import * as dotenv from 'dotenv';

dotenv.config({
	path: '.env.local', // tell dotenv to parse values from this file
});

export default {
	schema: './src/db/schema.ts',  // location of our schema
	out: './drizzle', // here just leave the defaults
	driver: 'pg', // as we are using postgres
	dbCredentials: {
		connectionString: process.env.POSTGRES_URL, // value from .env.local file
	},
} satisfies Config;
It's not necessary to create this file, but it's making the process of generating migrations way easier.
#Step 5 - migrations
Yeah, so what are those migrations anyway? In simple terms, they are a version control system for our database. At first you generate some initial schema in a sql format, using drizzle CLI, and then push it to the database (it's like pushing initial commit to the git repository). Later, when you make some changes to the schema, e.g. add/remove some column or add/remove some table, you generate an update to the database schema again, so that you can push it again and alert your database, so that it's in sync with your application's code.
You can read more on migrations in the official docs.
#Using drizzle-kit
To perform our first migration, we should go to our package.json file of our app, and add two new scripts to it:
./package.json"scripts": {
   ...
   "migration:generate": "drizzle-kit generate:pg",
   "migration:push": "drizzle-kit push:pg"
},
You can name them however you want, important thing is the command that they execute.
The first command, migration:generate will generate three new files in ./drizzle folder:
0000_random_name.sqlmeta/_journal.jsonmeta/0000_snapshot.json
In the generated .sql file we can find an SQL command that would create our "posts" table:
CREATE TABLE IF NOT EXISTS "posts" (
	"slug" text PRIMARY KEY NOT NULL,
	"title" text NOT NULL,
	"subtitle" text,
	"createdAt" char(10) NOT NULL,
	"excerpt" text NOT NULL,
	"tags" text[] NOT NULL,
	"categories" text[] NOT NULL
);
Now let's run the migration:push command to run this SQL operation on our local database. If everything in our config is ok, we should see [???] Changes applied message. If there is an error message instead, make sure that you have provided the right connection string and that content of your .env.local file is read by dotenv package.
With that set up, how can we test if our table is created and has the right columns inside? There may be a few ways to explore this database, one of them is to use Drizzle Studio.
#Step 6 - Drizzle Studio
Drizzle Studio in a tool built in drizzle, that allow us to explore our database. It requires almost no additional configuration and has pretty modern layout, in comparison to many other database explorers. How to set it up? We can do it, again, through an npm script.
./package.json"scripts": {
...
   "migration:generate": "drizzle-kit generate:pg",
   "migration:push": "drizzle-kit push:pg",
   "drizzle": "drizzle-kit studio --port 3001"
}
In our scripts object we add one more command. I called it "drizzle", you, again, can choose any name you like. With this command we start drizzle studio on port 3001. This value is again up to you. Just make sure that this port is not taken by any other service that you may run on your device.
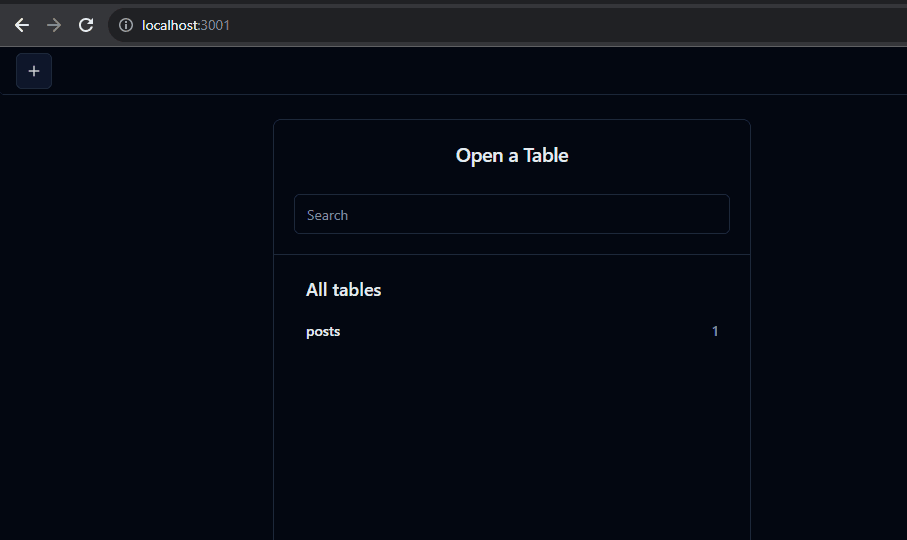
After running this script, you should be able to access Drizzle Studio under localhost:3001 in the browser.
 Drizzle Studio overview
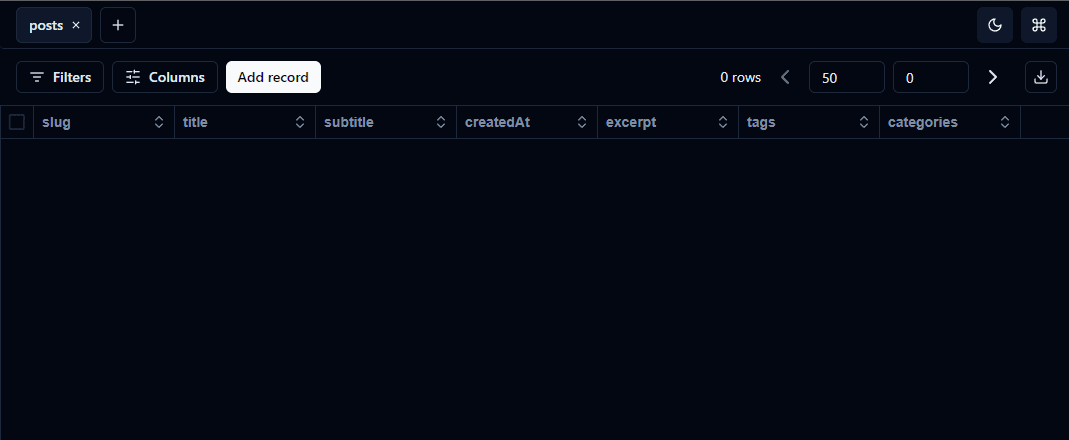
When we click on the "posts" table, we should see that it does have all the columns that we defined.
 "posts" table in Drizzle Studio
We can add some data here, as well as remove or modify it. We can also query this table from our code, as well as update or insert some new records into it.
#Step 7 - Updating the database schema
What if we want to add a new table, or rename some of the fields? In my case, I'd like to rename excerpt column to description as it sounds better to me, and maybe add one more column to keep information if the post belongs to the series of post.
./src/db/schema.tsexport const posts = pgTable('posts', {
	slug: text('slug').primaryKey(),
	title: text('title').notNull(),
	subtitle: text('subtitle'),
	createdAt: char('createdAt', { length: 10 }).notNull(), // must be 2023-01-01
	description: text('description').notNull(), // rename
	tags: text('tags').array().notNull(),
	categories: text('categories').array().notNull(),
	series: text('series'), // add new field
});
That's the updated schema. So what now? Now we run the same two npm scripts as before, to generate .sql file with update and then push those changes to the database. Starting with pnpm run migrate:generate.
During this process, we may be asked questions about the schema change. We can select desired option using arrow keys and accept it with Enter.
 Successful schema update message
We should see new .sql file added in the drizzle directory with the update SQL commands.
ALTER TABLE "posts" RENAME COLUMN "excerpt" TO "description";--> statement-breakpoint
ALTER TABLE "posts" ADD COLUMN "series" text;
To sync this changes with our database, now we have to run pnpm run migration:push. If the command succeeded, again we should see the [???] Changes applied message. If we had more complex relationships in our database, we may be asked to resolve some conflicts. In my case, they didn't occur, because I have a really simple table yet.
And that's it! We have created our local Postgres database instance, defined its schema and connected it with our Next.js application through Drizzle ORM!